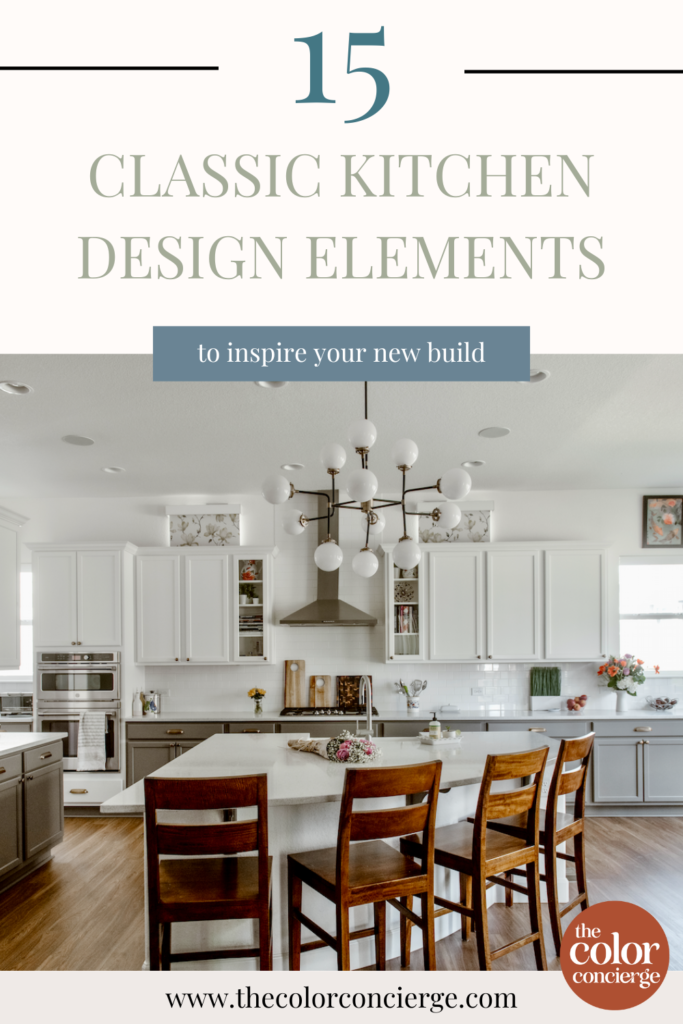
The kitchen is truly the heart of a home. It’s where your day begins, and your family gathers for big moments and everyday ones. Back in 2019, when we built our new home, I had the opportunity to customize my new build kitchen design, I knew I wanted to focus on timeless kitchen design elements to create a space my family would enjoy for many years.
My goals for this kitchen were simple. First, I wanted it to be functional for my family. My husband and I have five children between us who were in their teens and early 20s when the house was built. It can get crowded when we’re all in the house (like throughout the pandemic). Cooking for the whole family was like having Thanksgiving every day.
I also wanted something that felt clean and modern and wouldn’t need to be updated in 10 years for a strong resale value.
Put all these goals together, and my task was straightforward: pull together simple kitchen upgrades to create a beautiful space that would stand the test of time. In this post, I’ll share exactly how I did it.
*This post contains affiliate links for products I use and love. If you click on some links and make a purchase, I will get a small commission at no cost to you. This helps pay for the costs of the blog, so I can continue to offer great content to our readers.
About The Color Concierge
Our Colorado-based paint color consultants make finding the right paint colors for your home easy. Whether you’re painting the exterior or interior of your home, our simple yet effective process lets us get your paint color right the first time. We’ve helped thousands of homeowners transform their homes into a space they love. Learn more about ONLINE COLOR CONSULTATIONS today.
Timeless Kitchen Design Principles
When you design a new build home, everyone has at least one design center appointment, where you sit down with the builders to pick your finishes (flooring, paint, doorknobs, etc.) and design custom spaces (like the kitchen!). Every session starts with the kitchen.
I also knew that I wanted to create a beautiful new build kitchen design without the expensive upgrades available from my builder. If you’ve ever built a new construction home or even a remodel, you know those little upgrades can add up quickly!
I always tell my clients that $500 may not seem like much money, but ten $500 decisions add up to $5,000, and so on. As they say, it’s death by 1000 cuts.
Thankfully, when you strategically combine simple (even builder-grade) kitchen finishes, you can create a stunning timeless kitchen design.
Pro Tip: After you pick all your finishes, move them into a natural light area near a window without overhead lights on. This will help you see the undertones to avoid clashing mistakes. Artificial light can skew the undertones. It is also a great way to evaluate the palette of your hard finishes.
The key is to follow a few important design principles:
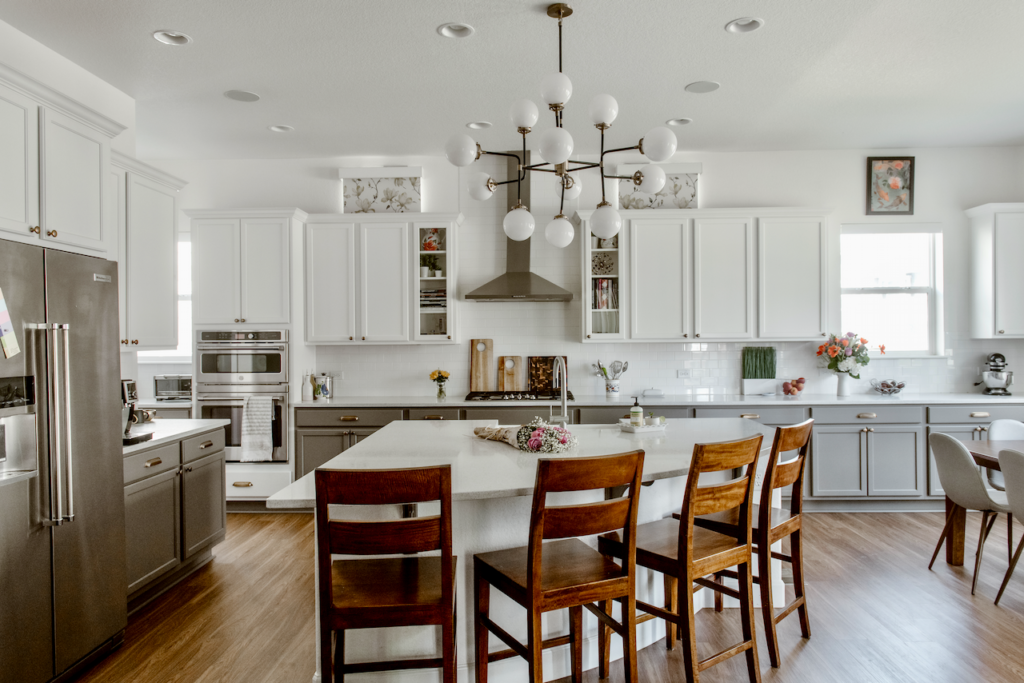
Keep your color palette simple.
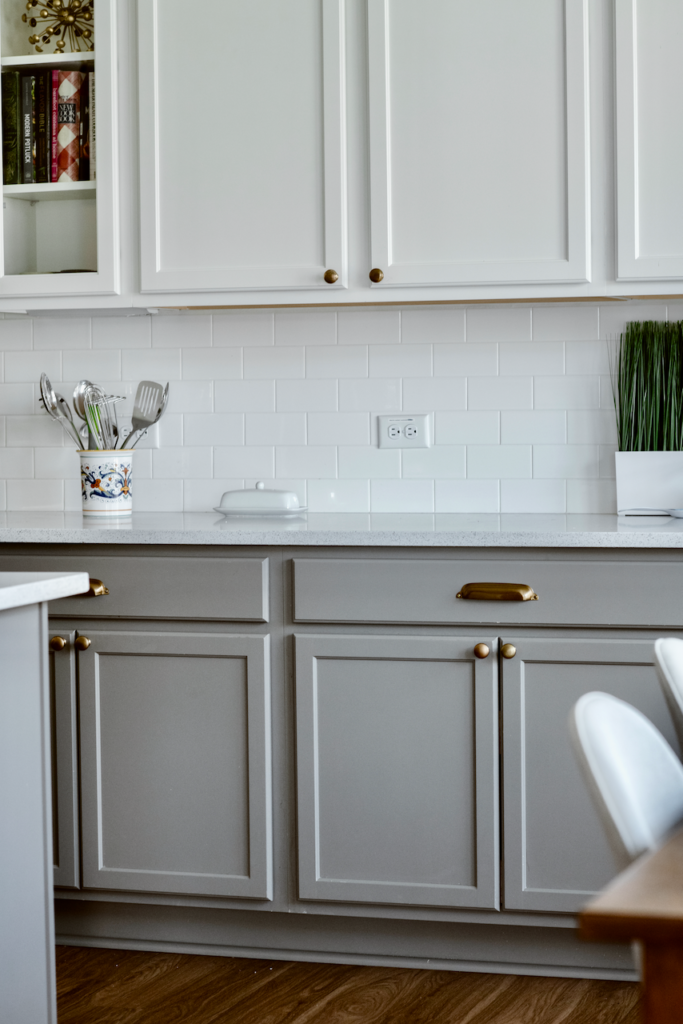
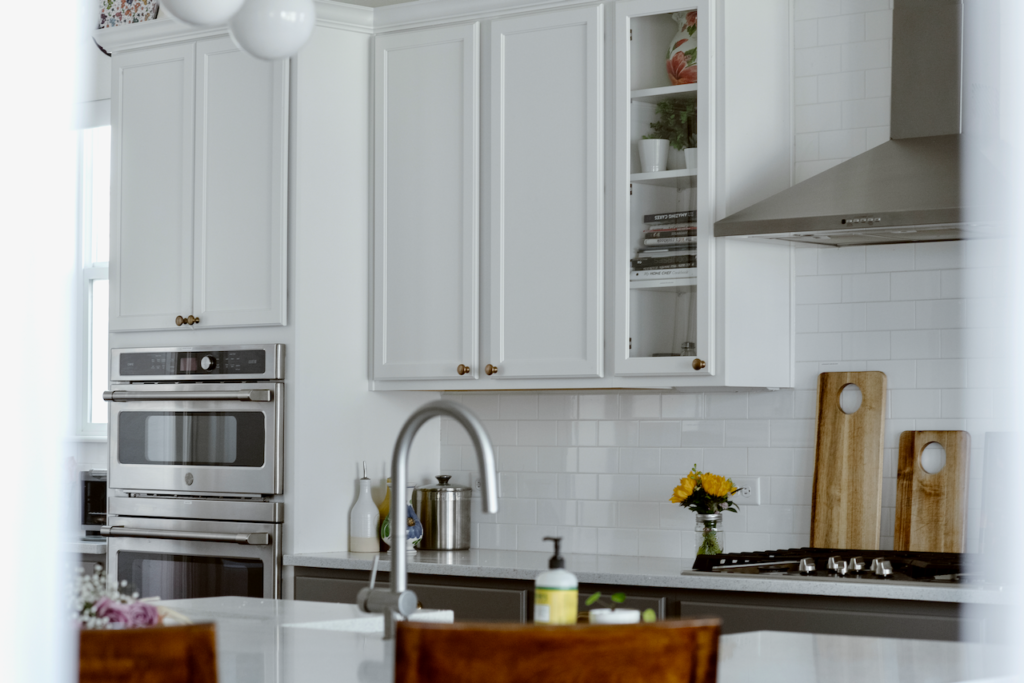
There are lots of great ways to add color to a room. But if you want a kitchen that never goes out of style, then it’s best to stick to a few key colors. I used white and gray throughout my kitchen space, with splashes of black in the lighting, brass hardware, and stainless appliances.
The hard finishes – countertops, backsplash, flooring, and cabinets should be simple and act as a backdrop to everyday life. My color teacher, Maria Killam, always says that a timeless kitchen can be boring, and that’s ok. Styling and decor are what brings the room to life!
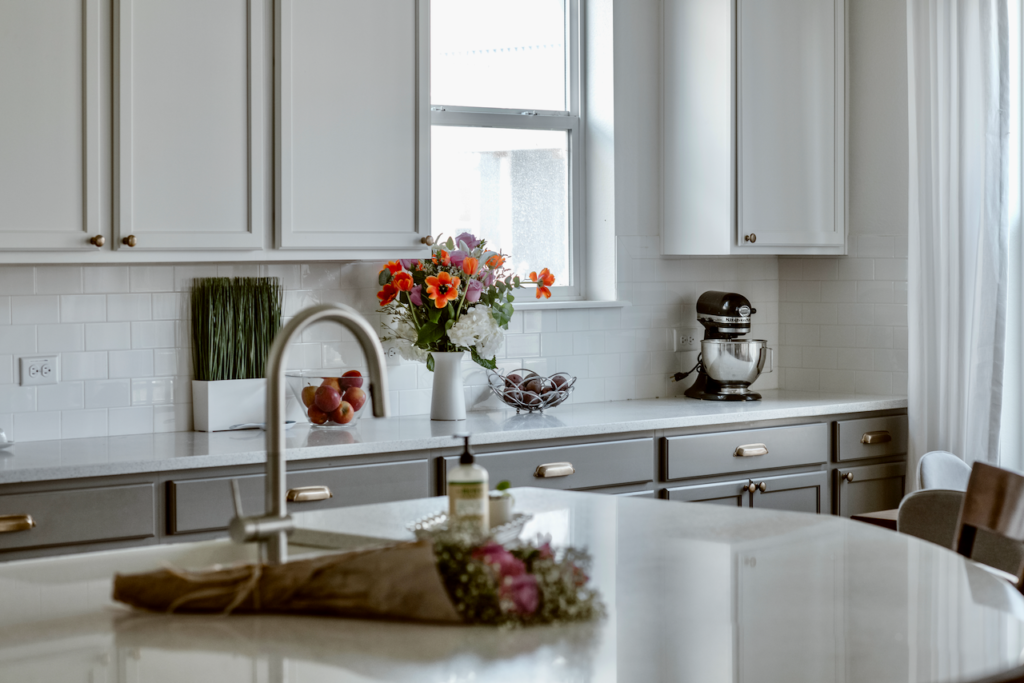
Splashes of color were added throughout the room with styling and decor – fresh flowers, wooden cutting boards on display, and seasonal decor that can easily be changed throughout the year.

Pick one pattern per room.
With so many gorgeous tile and countertop options available today, it can be hard to choose the hard finishes for your kitchen (and make sure they all work together). The best thing I did to create this timeless kitchen design was to use just one pattern on the countertop. I consider the window treatments decor, which can be easily changed, unlike the solid surfaces.

My countertops are terrazzo, lovely white quartz with tiny glass flecks and sparkling metal. The cabinets are solid white and gray, and my backsplash is a simple white subway tile with white grout that helps them recede into the wall.
If I had a patterned backsplash and a busy countertop, it would be tough to get the patterns to match (even for a designer!). You can’t believe how often I see backsplashes and countertops that clash with each other.
Pro tip: Avoid patterns on both the backsplash and the countertop. They are hard to match and challenging to decorate around later.
Spend where it counts.
While I didn’t want to go for every new build kitchen upgrade offered, I knew there were a few things I would invest in. I kept my costs low by selecting a simple white subway backsplash with white grout.
Kitchen upgrades included 2-toned kitchen cabinets, lower cabinet roll-outs, appliances, a farmhouse sink, soft-close doors and drawers, under-cabinet lighting, and a mighty metal hood. I focused on fixed elements that I knew would be difficult to upgrade later.
Lighting and cabinet hardware were added after-market because I didn’t like the builder’s options.
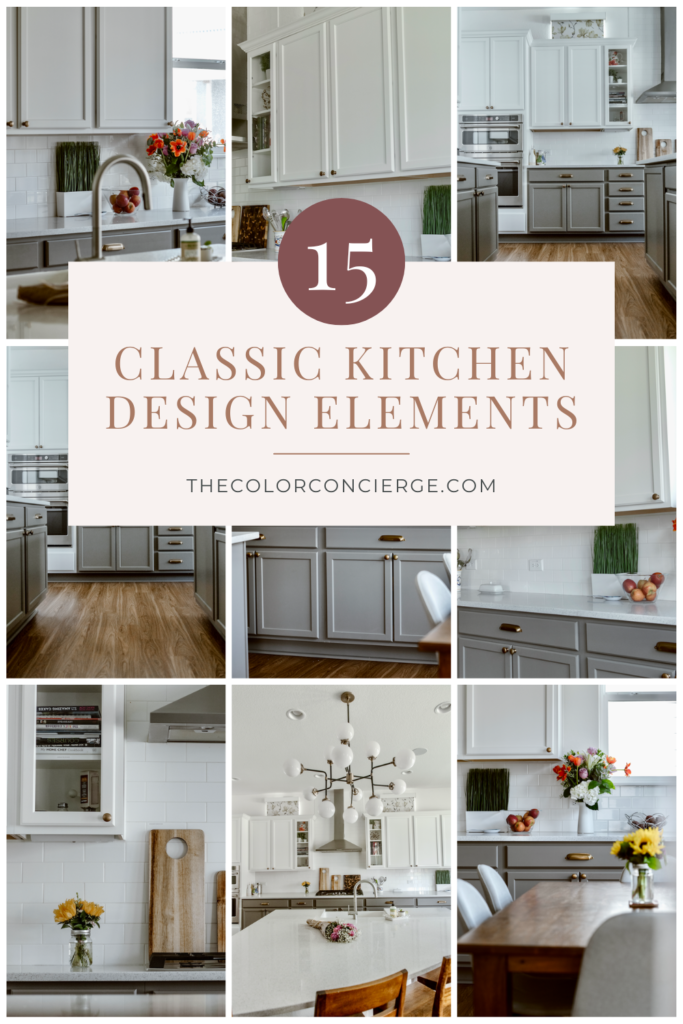
15 Timeless Kitchen Design Elements to Try in Your New Build
Keep reading for a walkthrough of my custom new build kitchen and all of the simple elements that make this one of my favorite spaces in the house.
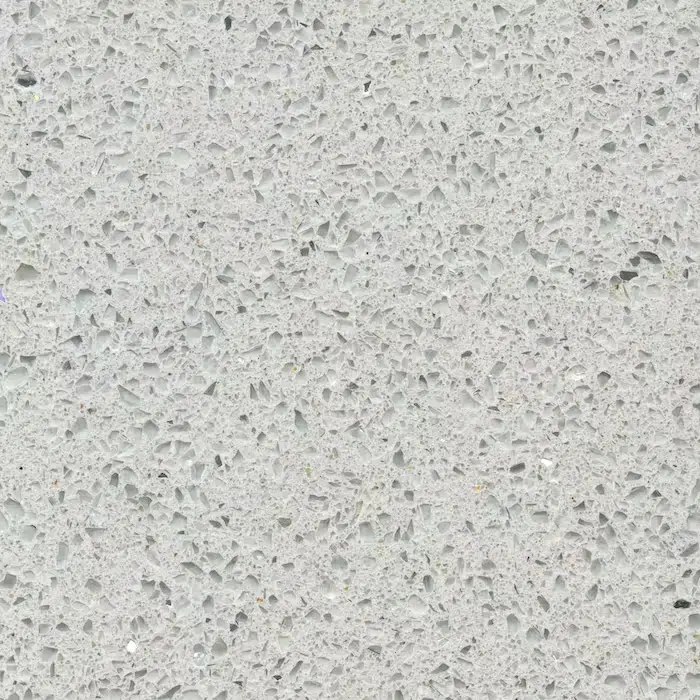
Quartz Countertops
Quartz is a great countertop option for a timeless kitchen because it is durable and modern, with many different designs available.
In my kitchen, I used a white quartz countertop with tiny metallic flecks that are only visible when you’re working at the counter. It’s a beautiful, timeless look that lays a rock-solid foundation for the rest of the kitchen. Mid-century modern Terrazzo surfaces inspire the design.
These counters are Silestone Stellar Snow quartz, which is non-porous, stain and scratch resistant, and comes with a 25-year warranty.
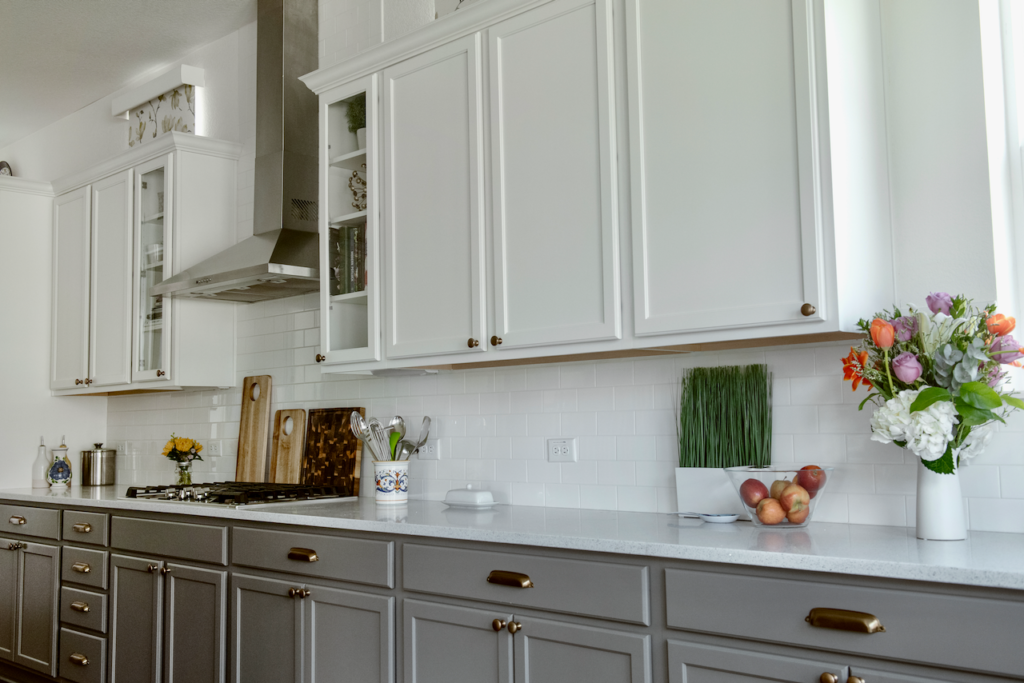
Two-Toned Kitchen Cabinets
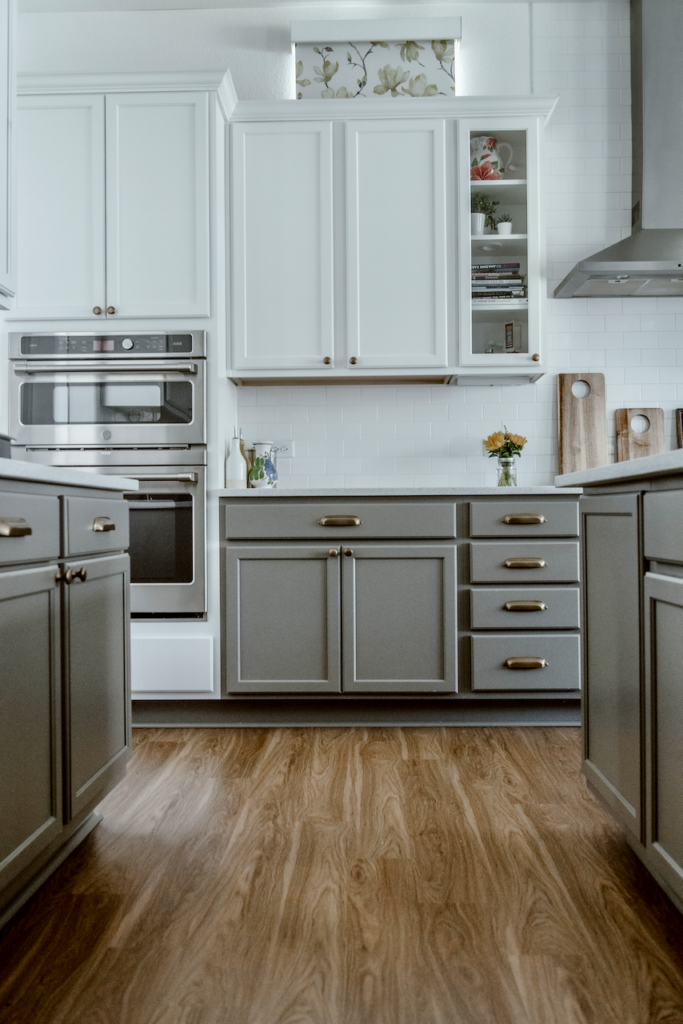
Two-toned (tuxedo kitchen cabinets – Article) are a great way to add some interest to a simple, timeless kitchen design. A tuxedo kitchen could give you the best of both worlds if you’ve been stuck between an all-white kitchen or trendy, colorful kitchen cabinets.
The upper and tall cabinets are white like SW Pure White (Sample), and the lowers are Benjamin Moore Chelsea Gray, a warm gray that pairs well with the white cabinets and warm wood floors.
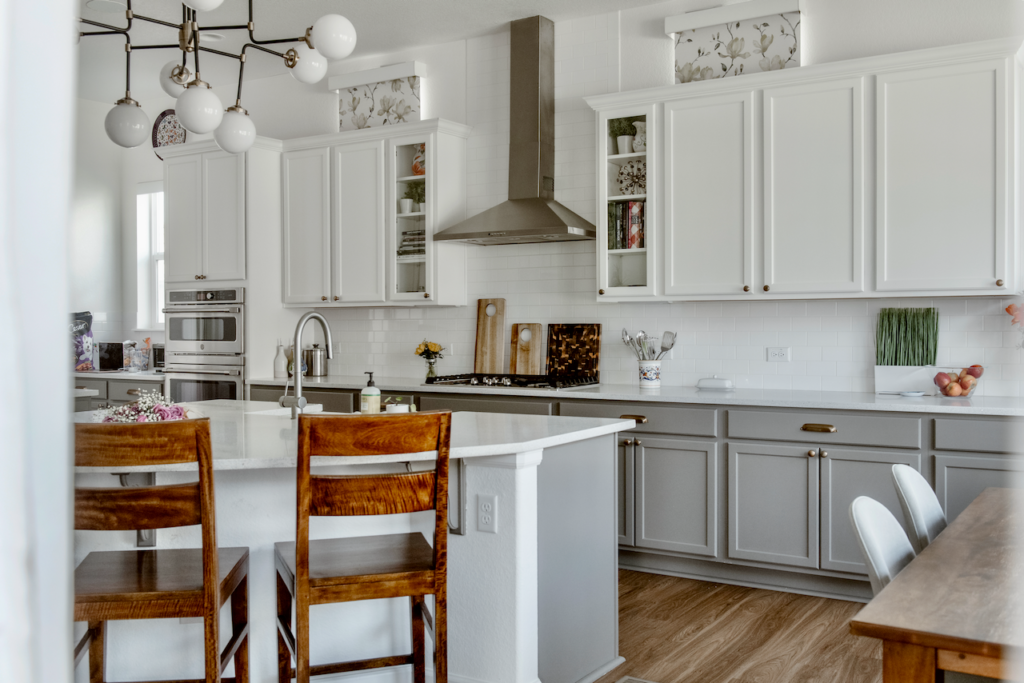
I also added glass-front cabinets to the left and right of the stove to add some texture and lightness without straying from my simple color palette. These cabinets store favorite cookbooks, cooking oils, vinegar, frequently used spices, and some decorative pieces.

Avoid Corner Cabinets
This kitchen design element lacks a design element…corner cabinets! Corner cabinets are usually where pots, pans, and lids go to never be seen again. Sometimes they are unavoidable, such as in a U-shaped kitchen. They’re typically very deep, and even if they come with a lazy susan, they’re not as functional.
I knew I wanted a kitchen layout that allowed me to avoid corner cabinets altogether. While it isn’t possible in every space, I highly recommend it if you can do it in your home!

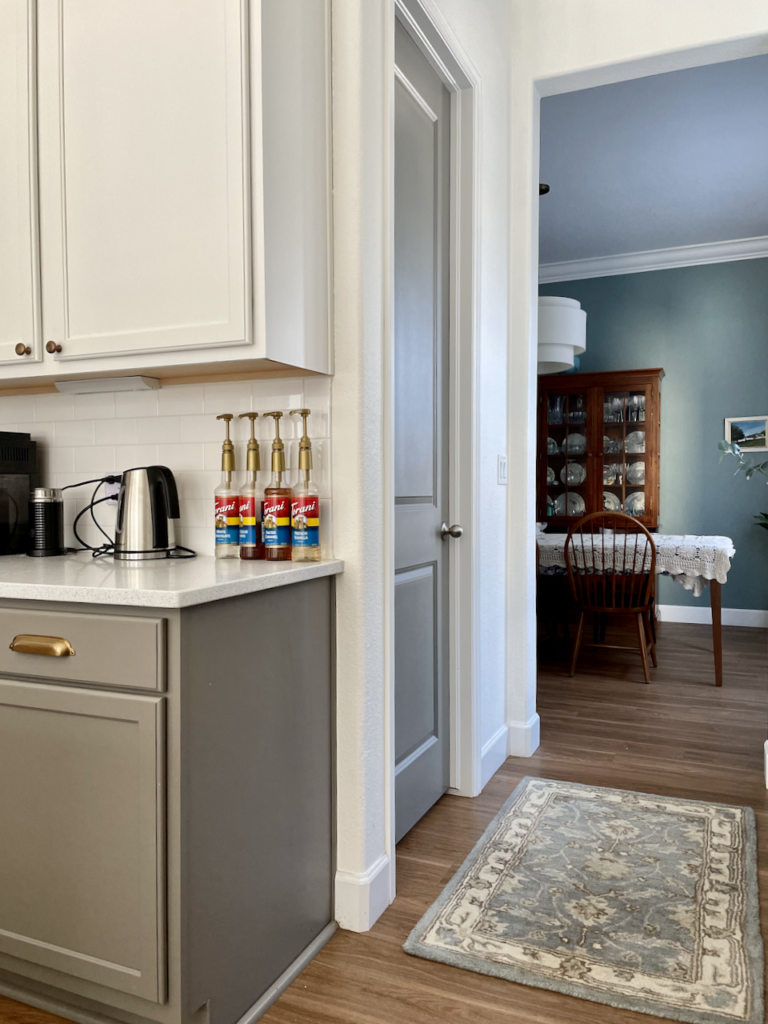
Painted Pantry Door
One of the best ways to pull kitchen design elements together is to repeat similar colors over and over again, creating layers of color throughout the space. If you have a pantry door in your kitchen, try painting it the same color as your kitchen cabinets or island.
In my case, I painted my pantry door to match my BM Chelsea Gray (Sample) lower cabinets. This is a simple kitchen design element, but it elevates the space. We used either Chelsea Gray or Pure White for the bathroom vanities in this house for a consistent whole-house color palette (Article).
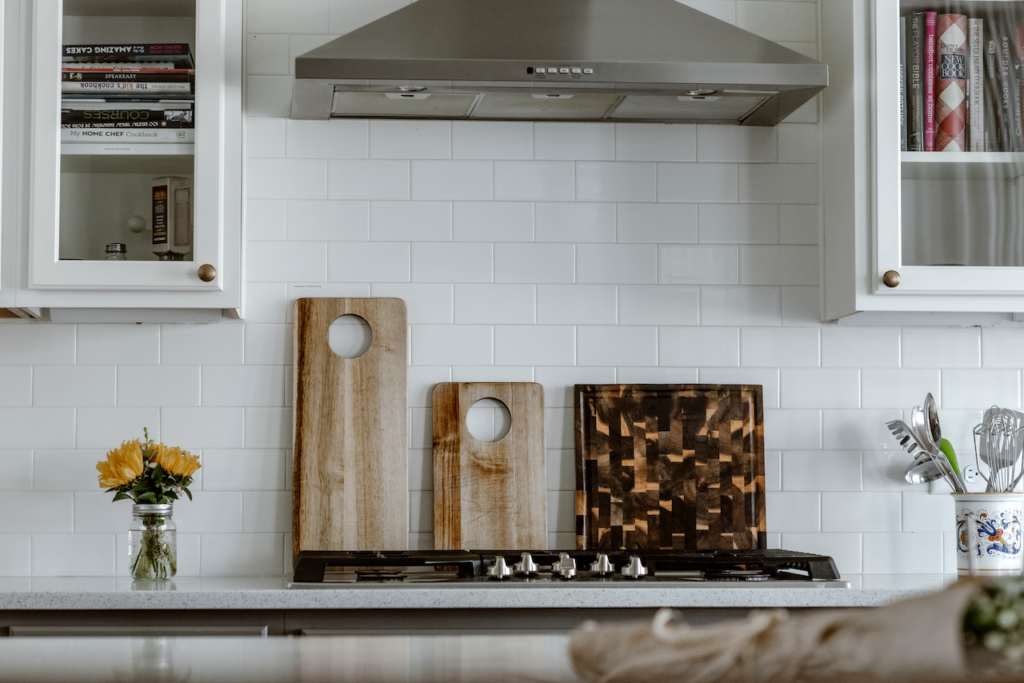
Simple Stainless Steel Range Hood
Many higher-end kitchens today feature custom wood vents that match the cabinets. But I knew I wanted to keep my kitchen finishes as simple as possible, so I used a GE stainless steel range hood. It’s powerful, easy to clean, vents to the outside, and has an excellent cooktop light.
I honestly prefer this style to a wood vent cover, which can get filthy from cooking and is challenging to keep clean.
The stainless steel material ties in with my appliances and the gray elements throughout the kitchen, repeating the same colors and finishes throughout the space.
There are also many beautiful custom-made metal hoods, but my builder didn’t offer any of these.
(In this article, I participate in the Amazon Associates Program. As an Amazon Associate, I earn from qualifying purchases. This is at no cost to you and helps provide funding for this website.)

Cabinet & Drawer Pulls
An easy way to elevate a new build kitchen is to pick knobs for the cabinets and pulls for the drawers.
At the time, the builder didn’t have what I wanted, so I added the hardware after we moved in.
The original brass knobs and pulls came from Pottery Barn. The knobs are still available, but the matching pulls are being discontinued. Instead, I’ve selected these matching knobs and cup pulls to get the look.
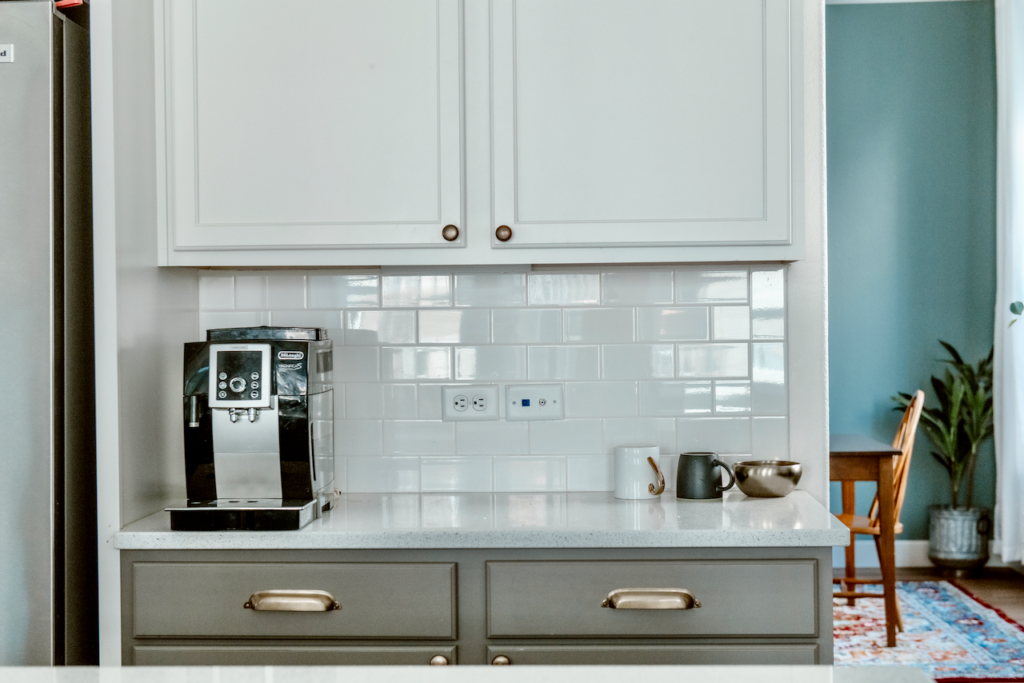
Classic Subway Tile
There are many people out there who hate subway tiles, but it’s such a favorite of mine. Subway tiles are a truly timeless kitchen design element that is as cost-effective as they are beautiful. I used 3×6 white subway tile in this kitchen, which you could easily find at Home Depot for a meager price.
I love the Daltile Rittenhouse white 3×6” white glossy subway tile from Home Depot.
The key to using subway tiles is to keep your backsplash simple. Make sure your tile is similar to the other whites in your kitchen. Don’t mix a super creamy white cabinet with a stark white backsplash or it won’t look right.
And remember, if you don’t want your subway tiles to act as a pattern in your kitchen design, use a grout that matches the tile. I used a white stain-proof Polyblend grout for mine that has remained clean for over three years despite a house full of very messy chefs and LOTS of spaghetti sauce. In my old house, I had stain-proof white epoxy grout, which also worked flawlessly. Check with your tile installer for options.
The cabinets in my kitchen are similar to SW Pure White, and the tiles match. Both colors look lovely paired with BM Simply White (Article) walls and SW Extra White trim.
My favorite surprise about glossy white subway tile is its sparkle when the sunshine hits it. Who knew subway tiles could look so beautiful?!
Lighting
A kitchen needs many types of lighting. For starters, it’s a work area.
Undercabinet Lights
Undercabinet lights help brighten the dark corners when you are working under the upper cabinets. They are relatively inexpensive. Ideally, it’s nice to be able to get them hard-wired into the kitchen as I did, but these products have come a long way.
You can now get rechargeable wireless lights that turn on at the wave of a hand, and stick to your cabinet with adhesive. Here is my favorite pick:
Motion Sensor Under-Cabinet Light
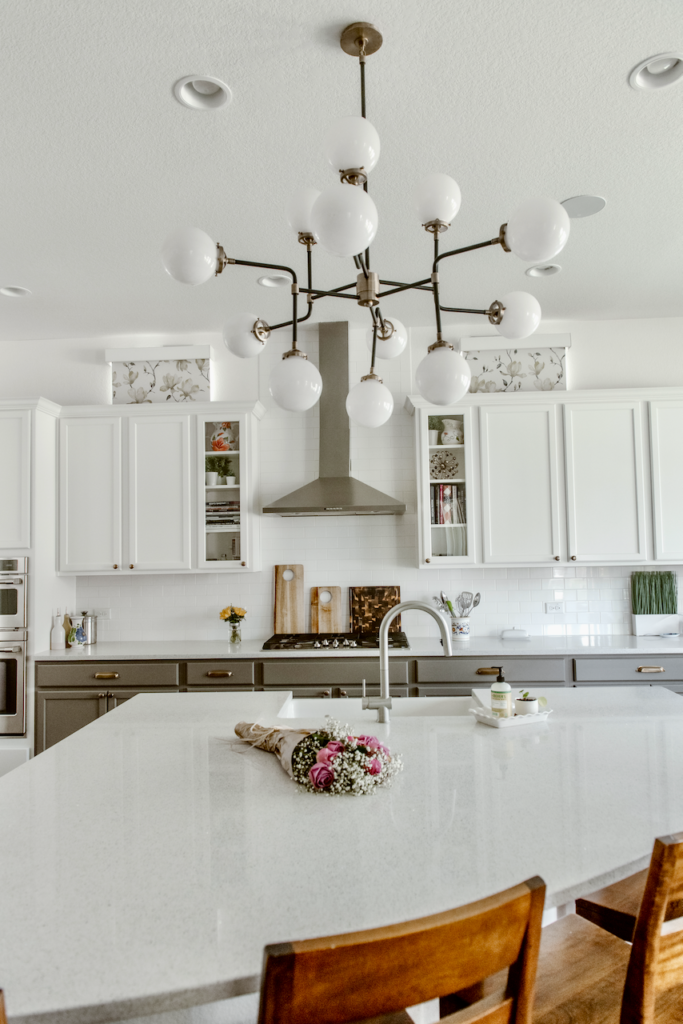
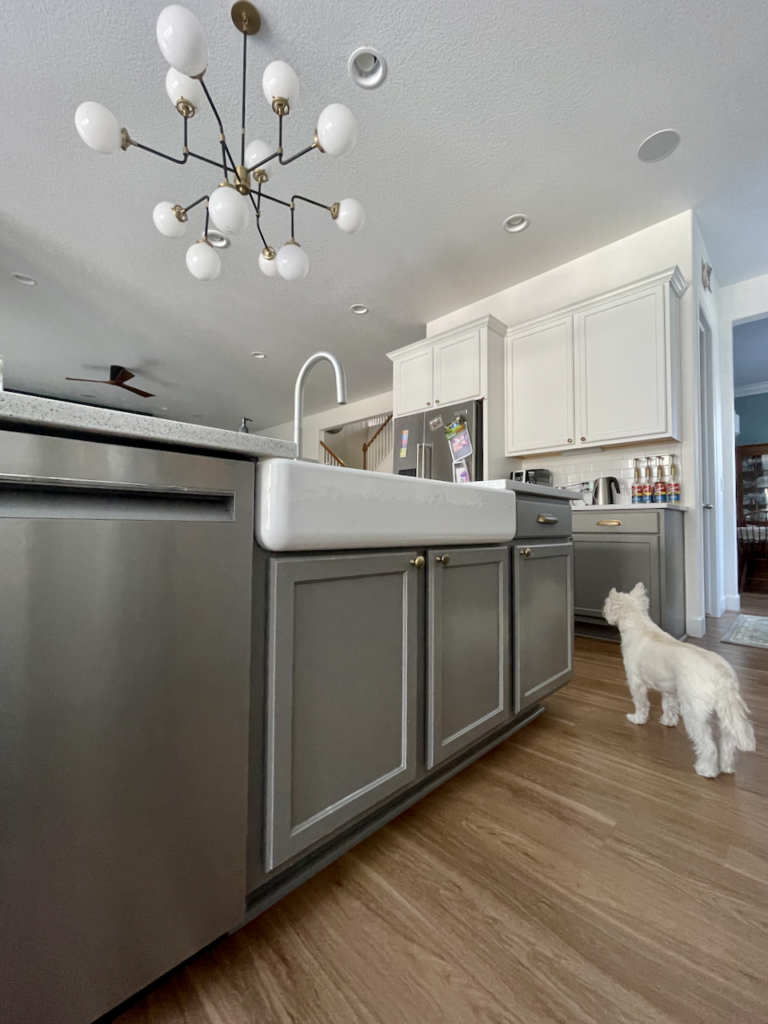
Island Lighting
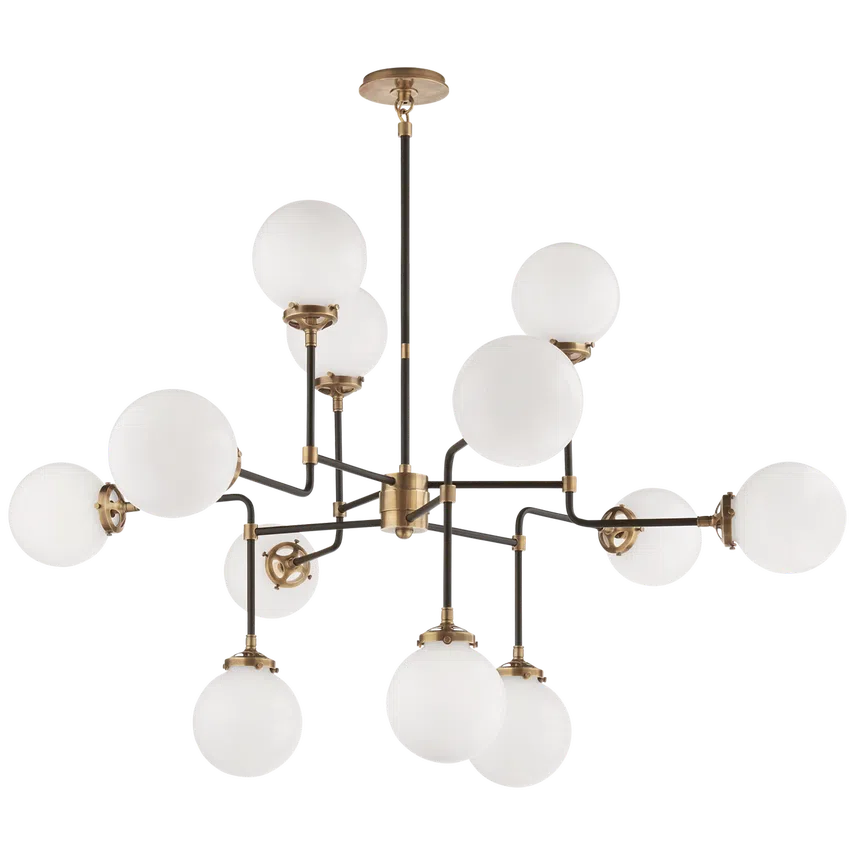
There is a whole science to Island Lighting. For this kitchen, the island had a really funky triangular shape. Instead of pendants, I picked this gorgeous Medium Bistro Chandelier from Visual Comfort. It was such a splurge, but it makes me smile every time I walk by, which is ALL the time.
Dining Nook Lighting
The dining nook is always a part of the kitchen, so the lighting needs to match the lighting in the kitchen. I picked the Large Gale Pendant in brass, with seeded glass, and it complements the Bistro Chandelier beautifully.

In my previous kitchen, we installed these absolutely amazing small Hicks Pendants. I mean, the links are rectangular, and you can get a version with both brass and bronze.
LVP (Laminated Vinyl Plank) Floors
LVP floors are an alternative to traditional hardwood floors and tile They’re budget-friendly, highly durable, waterproof, and easier to install.
LVP flooring is made from vinyl planks with high-definition photos of hardwood floors. It’s hard to believe, but they look genuine! Adding warm, wood-look floors to a kitchen is a great way to elevate the space and make it stand out. And wood floors never go out of style!
In our home, we used the same LVP flooring on the main level, which helps tie the kitchen together with the rest of the house. This LVP model is no longer available, but the warm brown color is timeless. Instead, consider Coretec Waddington Oak floors, which will be my next upgrade. As with any finish, test in the house with the other finishes that will be used.
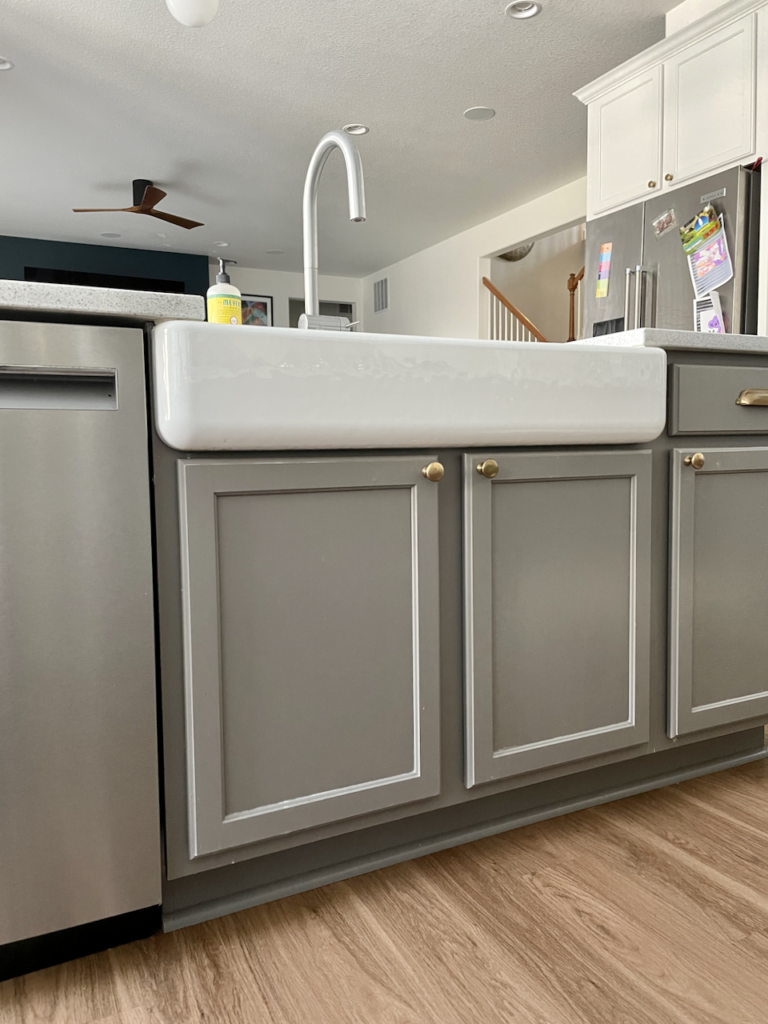
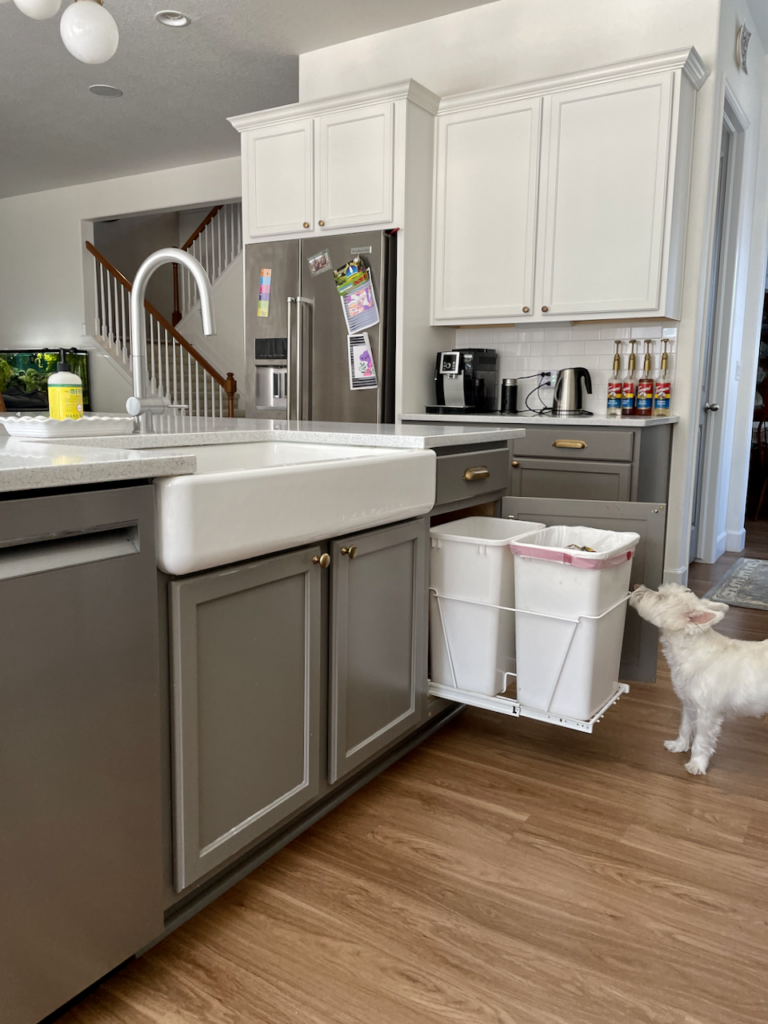
A Large Farmhouse Sink
I don’t always associate farmhouse-style elements with a timeless kitchen design. But I’m willing to make an exception regarding a large farmhouse sink. My favorite is the Koehler Whitehaven sink. It was a big splurge through the builder, but worth it. I’ve had this sink in my last two houses.
A deep, one-basin sink is much more functional than a traditional two-basin stainless steel sink. Look how easily I fit a baking pan, frying pan, and pot in there! There’s plenty of space to clean your dishes without making a huge mess of your countertops, and it looks a lot more elevated than a standard, builder-grade sink.

We ended up going with a white porcelain sink instead of a stainless steel one, and I’m thrilled with our choice. Not only does the white sink coordinate beautifully with the overall kitchen design, but it’s also effortless to clean. You can use a powdered bleach cleaner and scrub to your heart’s content without worrying about it getting blotchy or scratched.
Pro Tip: Don’t add a built-in soap dispenser or countertop garbage disposal button. These elements seem convenient, but they get gunky and dirty quickly.
Stainless Steel Appliances
Stainless steel appliances are practically standard kitchen equipment these days. So while they may not be “special,” they are exactly what I wanted for my timeless kitchen design.
For years I’ve seen dishwashers and other appliances with wood trim to help them blend into the cabinets. This is a nice clean look, but keeping them clean is hard, especially on appliances dealing with water.
Stainless steel appliances are easy to clean, coordinate well with just about any kitchen color palette, and are sure to stand the test of time.
We specified a slightly taller side-by-side upgraded fridge from KitchenAid. We chose this KitchenAid fridge for our new build kitchen, which is one of my favorite things about this space. This was also the second time I’d bought this model.
I love the way that the round handles feel on my hands.
It fits perfectly into the 72” high standard cabinet opening for a fridge. Still, without extra space at the top, that encourages so many of us to create a mini dumping ground on top of the fridge. The height specification is 71 ⅜”. It is about an inch taller than other brands and models in the price range, which makes it look sleek and built-in.

Roll-Out Cabinet Drawers
One of my non-negotiables when designing this new build kitchen was to have roll-out drawers inside the bottom cabinets. They make it much easier to store, organize and find pots, pans, and lids.
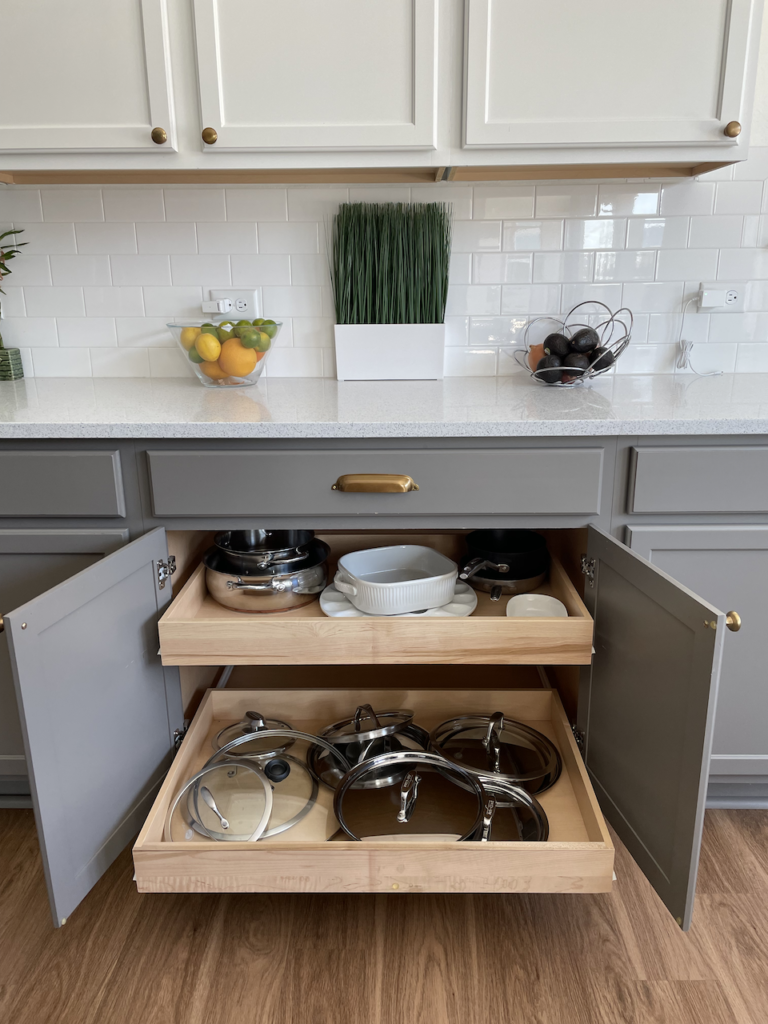
My builder had an option for large drawers on the lowers instead of cabinet doors, but it was way too expensive. These roll-out trays were a less expensive option.
You can also retrofit a traditional cabinet with roll-outs later. These practical roll-out trays were terrific in my old house before the kitchen renovation.
Roll-out trash and recycling bins were added next to the sink, where they can easily be accessed while preparing food or cleaning up after a meal.
Mixed Metals
Mixing metals is a simple way to elevate a new build kitchen design or renovation without spending much more money.
Anytime you mix colors and finishes, you have to be strategic. Otherwise, it can end up looking a little all over the place. Make sure you always repeat each color or finish at least once within a room to ensure it looks cohesive.
For example, the cabinet pulls and knobs are all brass throughout the kitchen, which ties in with some of my lighting fixtures. My prominent lighting fixture is brass with black accents, like my cooktop. My faucet and sink knobs are stainless steel, which ties in with the stainless steel appliances. Together, my kitchen looks custom and cohesive.
Pro Tip: Don’t mix cool metals (chrome) with warm metals (brass, nickel, bronze). Matte black can pair with anything.
Upgraded Lighting
Kitchen lighting is a huge part of the overall ambiance of the space. I knew I wanted to splurge on lighting when I designed my new build kitchen – it’s that important!
This gorgeous Bistro Medium Chandelier was the biggest lighting purchase, and it’s a focal point. I love how the brass and black metal stand out against my white and gray kitchen. It’s one of my favorite things in the house!
The Large Gale Pendant over the kitchen nook table was another splurge, and I never get tired of looking at it.
Under-cabinet lighting is another practical way to upgrade a kitchen – adding a ton of functionality. Under-cabinet lighting is one of those things that you don’t realize how much you need until you have it. And then you don’t know how you ever lived without it!
Butler’s Pantry
A butler’s pantry is another kitchen design element that isn’t usually standard but feels worth splurging on. I don’t have a photo of ours, but it is next to the double oven between the kitchen and the formal dining room.
Using this extra cabinet and counter space is totally up to you. Many butler’s pantries include a wine fridge or even a wet bar. Others simply provide extra storage.
We use ours as a breakfast station and keep our toaster oven, bread, cereal, and other simple breakfast foods. It’s also directly across from our coffee area and pantry, so it’s easy to whip up a quick breakfast without getting in the way of anyone cooking in the central kitchen.
Use-Based Zones
This leads us to the final and potentially most crucial kitchen design element: kitchen zones.
Creating zones in your kitchen ensures that you can have multiple people doing multiple things in the same space at the same time without feeling like you’re on top of each other. This is especially important when you have seven adults in the household, as we often do!
Cooking Zone
We turned our stove area into the ultimate cooking zone by having the oven, stovetop, and range hood surrounded by glass-front cabinets with cooking oils and cookbooks. Drawers on either side of the stove have cooking utensils like knives, spoons, and spatulas.
The drawers are also home to our favorite spices laid flat (no fancy spice drawers required!).
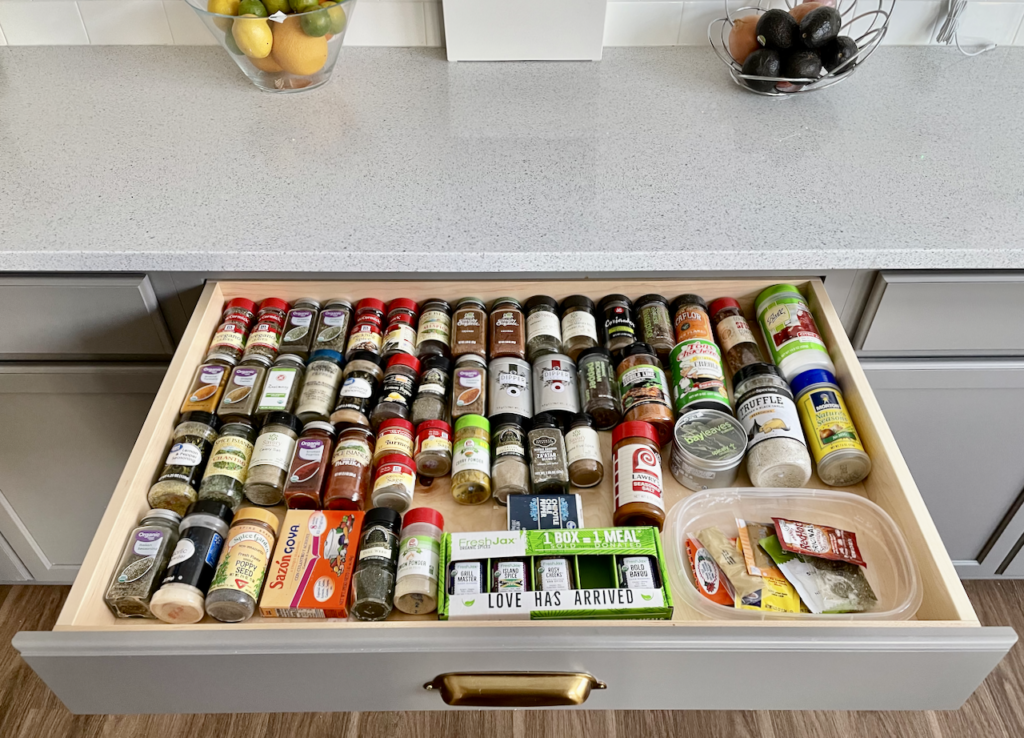
I love these in-drawer spice racks and had them in my previous kitchen. I couldn’t use them in this kitchen because my drawers were too shallow. Make sure you measure the depth of your drawers before you order them.
Clean-Up Zone
The island sink area is the perfect clean-up zone, featuring the sink, dishwasher, trash, and recycling. This makes cleaning up after a meal easy without walking back and forth between the sink and dishwasher. We also made sure that the cabinets and drawers where we keep our dishes, glasses, and silverware are close to the wash area, so it’s easy to put things away once they’re clean.
Coffee and Breakfast Zones
The counter and cabinet area near the pantry door is a coffee station. This section has our coffee machine, mugs, coffee, and tea in one place.
Our butler’s pantry (discussed above) is used as a breakfast zone. This area has our toaster, bread, cereal, and other quick-fix morning foods.
Baking Zone
We also have a baking zone in one of the far corners of the kitchen, in the dining nook. We don’t bake all the time, but it’s nice to keep all the baking tools together.
I keep my Kitchenaid mixer there, which is my pride and joy. The mixer was a mother’s day present when my daughter was two and is an essential tool in a family kitchen.
If I had to buy another mixer, I’d get one of those pretty colors you see in The British Baking Show.
By setting up the kitchen in this way, we (almost) never feel like we’re all on top of each other in this space, which makes it functional.
Key Learning Points
Creating a timeless kitchen design for your new build or renovation does not have to mean buying all the builder upgrades. Instead, prioritize your upgrades and can create a gorgeous custom kitchen with simple design elements that won’t break the bank.
Follow these design principles to create your perfect kitchen:
- Keep the color palette simple. Add in color with decorative elements, but stick to very simple colors for your cabinets, countertops, and backsplash.
- Weave colors and finishes throughout your kitchen. Make sure the same colors are used at least a couple of times for a coordinated, purposeful look.
- Select one pattern for the kitchen. Patterns can be fun, but it’s hard to match them, and they can look frenetic. If you want a truly timeless kitchen design, keep things simple.
- Create functional zones in your kitchen for the best functionality.
Are you designing a new build kitchen or remodeling one? Let us know which timeless kitchen design elements you’ll try in your home!
Online Color Consulting
If you still need help with cabinet or wall paint colors, backsplash, and countertop specifications, check out our Online Color Consulting packages.

Related Posts
- Coastal Kitchen Upgrade (Article)
- Tuxedo Kitchen Cabinet Paint Pairings (Article)
- 2019 Kitchen Color Trends (Article)
- 12 Timeless Kitchen Finishes for a Remodel (Article)
- Style Your Farmhouse Sink (Article)
- Carrara Marble Counters (Article)
About the Author

Hi, I’m Michelle Marceny, founder, owner, and Principal Color Designer at The Color Concierge. I believe a fresh coat of paint can completely transform a space. The Color Concierge was born out of my drive to help clients fall back in love with their homes. My clients trust me to help them find the perfect paint color for their home – whether it’s a whole-house paint color scheme or ideas for a single room.
Since The Color Concierge was founded in 2017, we have completed over 3000 color consultations, both online and in-person. I am a Certified Color Expert with 7 years of experience creating interior and exterior color palettes throughout North America.
Did you like this post? Don’t forget to pin!
We love your comments! Please note that the blog is meant as general advice, and it is not possible to give specific answers to your paint questions. If you want more specific advice, our Online Color Consultations will help you pick your paint colors. Thank you for your understanding.
8 Responses
I am in the middle of building my dream home. Your website has been a go-to for me as I work on the finer details. I am working on my kitchen and this article confirmed much of what I was planning and gave me new ideas to consider. I am building a 1930’s farmhouse style home. I’ve read Mariam Killam’s thoughts on color which was very insightful. My kitchen will be creamy white walls, cabinets and countertops. Instead of an island I’m having a wooden work table made with a marble and butcher block top. I wanted something I could move around. My pops of color will be my red kitchen aid mixer, pottery I’ve made and small watercolor paintings I’ve done of fruit and vegetables. I love your idea of putting in different colors of cabinets, but I’m stuck on what to do. It’s a big decision that I have to live with for quite awhile. As I get closer to having to make final decisions, I’m second guessing myself. Thank you for all the great insight and advice in your posts!
Hi Sylvia,
I’m so glad you enjoyed it!
Michelle
We might have asbestos in our walls, so it’s helpful to know that you should just leave the substance alone if it’s in tact. If there is asbestos in the wall, we absolutely do not want to demolish them in order to renovate our kitchen!
I really appreciate this well-written blog about class kitchen design. This is a must-read.
Thank you so much!
Michelle
I was at a loss for how to improve my kitchen. Not anymore. Thanks for the tips.
Adding a cleaning zone is a great idea. I Have struggled with our old kitchen for years. I was excited when my husband came home and told me, “it’s time to do some kitchen updating.” We really couldn’t afford more than somecabinet painting but getting started made me so happy. Thank you for the kitchen tips.
I love your idea to upgrade the lighting. I think this was the best tip.